Monday, 1 April 2013

How to Setup Gmail Account with MS Outlook 2013

A few months ago Microsoft has announced the latest MS Office which is entitled as "Microsoft Office 2013". There are many facilities and improvement in MS Office 2013. So basically we are here to teach you regarding the setup of MS Outlook 2013 with your any Gmail Account.
Usually people wants and like the desktop mail setting because they will be notify when a new mail will arrive. And it very easy to build up. It is good thing that still Google is allowing their Pop and Smtp servers to enable this feature with MS Outlook. Although Yahoo Mail has stopped this service for free users since years ago. MS Outlook will provide you to received your mails quickly in your PC and sent mails simultaneously and you can also check your inbox anytime to find any older mail even without having internet connection because all of inbox/Outbox and saved mails will be backed up to your PC automatically. I personally use Gmail for Email Service and using MS Outlook since 4 or 5 years and It is working fantastically without having any trouble. So basically you are here to connect your Gmail account with MS Outlook 2013.

Even using MS Outlook 2013, you're still able to receives your mails in "Gmail Website" because there is an option to leave a copy of all receive mails to your "Gmail Inbox or Archived Folder".

So the step-wise tutorial with screenshots is given below, just read and follow the instructions carefully to avail this feature free.

Step No. 1
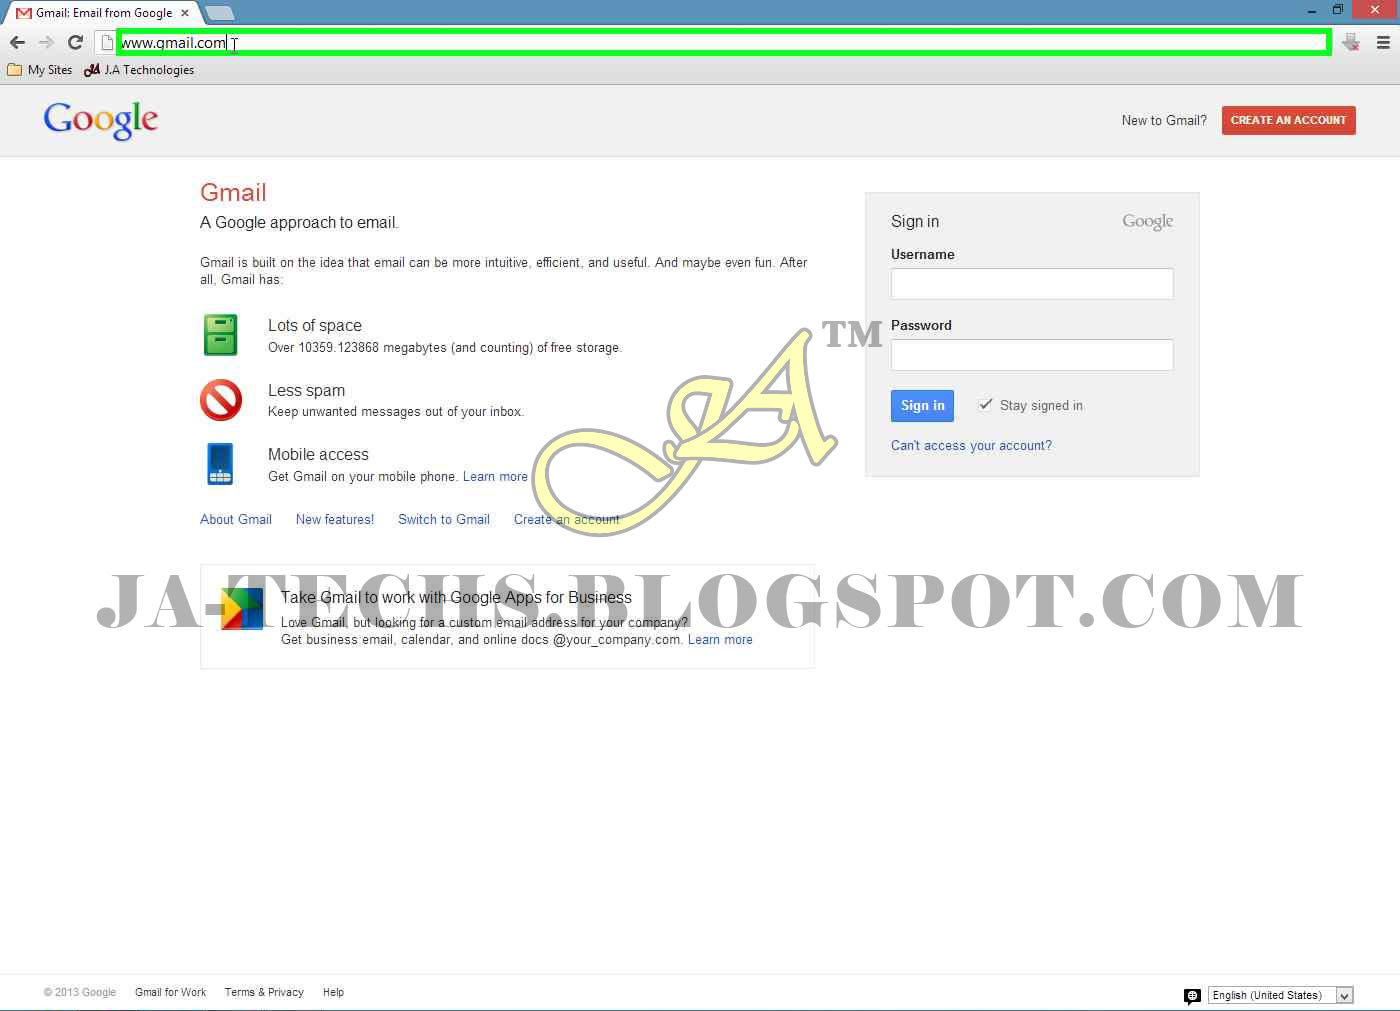
Go to Gmail.com and login to your Gmail Account.

Step No. 2
Just enter your correct "Username" and "Password" to login.

Step No. 3
When you will be login successfully just go to "Settings" as shown
in above picture.

Step No. 4
On the Setting Screen just go to "Forwarding and POP/IMAP" Tab
from where just Enable POP by selecting "Enable POP for all mail
(even mail that's already been downloaded)" or select "Enable POP
for mail that arrives from now on"
(It depends upon you to choose whatever you wants but remember
that by selecting first option and in case you have hundreds of mails
in your inbox then it'll require enough time to download them first.)

Step No. 5
After selecting "Enable POP" just click on "Save Changes" button.
As mouse cursor is over it in above Image.

Step No. 6
Now just open "MS Outlook 2013" by selecting the application.

Step No. 7
If you are opening MS Outlook first time then It'll show in this way
as shown in the above picture. Just click on "Next" button to proceed.

Step No. 8
It will ask to setup Outlook. Choose "Yes" and click on "Next" button.

Step No. 9
Now select "Manual setup or additional server types" and click on
"Next" button to continue.

Step No. 10
Choose "POP or IMAP" service and proceed with "Next" button.

Step No. 11
Now Type your Name, full email address (with @gmail.com) and
type incoming mail server as "pop.gmail.com" and outgoing mail
server as "smtp.gmail.com". Now type User Name and Password.
Remember that your User Name is your Gmail address so type
full gmail address with (@gmail.com). "Check" on Remeber
Password. and Click on "More Settings" button.

Step No. 12
After clicking on More Settings, just Tab to Outgoing Server and
"Check" on "My outgoing server(SMTP) requires authentication".

Step No. 13
It's time to Tab "Advanced" check on "This server requires an
encrypted connection (SSL). Then incoming Server (POP3) will
be "995".

Step No. 14
Just type "465" in "Outgoing server (SMTP) and select "SSL"
encrypted connection as shown in the Picture and click "OK"

Step No. 15
After clicking OK button, now just click on "Next" button to
complete the final process.

Step No. 16
Now Outlook will Test the connection and will send a Testing mail.
When it'll show "All Tests completed successfully" just click on
 "Close".

Step No. 17
So Click on "Finish" button to initialize your MS Outlook 2013.

Step No. 18
Wait until it completes sending/receiving process and you'll see your
Inbox mails after it'll download them to MS Outlook.
So Now you can able to send and receive Emails through Outlook.

Step No. 1-A
If you're opening "MS Outlook 2013" second or above time then just
click on Blue "FILE" button as shown in image.

Step No. 2-A
So here click on "Add Account" button as shown in Picture.
And follow the Tutorial from Step No.8 to Step No.18.


Finally that's the Tutorial for the people who wants to connect and use MS Outlook 2013 with their Gmail Accounts.
For assistance regarding the issue, please feel free to leave your query or comment under this post for quick response.

Wednesday, 27 March 2013

Cadillacs and Dinosaurs Game PC Version

Download Cadillacs and Dinosaurs Game for Windows/PC Version Free.


Cadillacs and Dinosaurs PC Game
This is one of the Top and Finest classic video game. The genre of this game is Arcade, which was released on April 1993 by Capcom. The provides the facility to play this game with Maximum Three Players at the same time. Players select one of four characters: Jack Tenrec (balanced type), Hannah Dundee (skill type), Mustapha Cairo (speed type) or Mess O'Bradovich (power type), each with their own strengths and weaknesses, as well as unique attacks. Up to three players can play at once. Players guide their selected characters through eight stages, battling various enemies and bosses, ending with Dr. Simon Fessenden. The game's titular dinosaurs make appearances as neutral characters that may attack both player characters and enemies.
In Cadillacs and Dinosaurs the player has access to several attacks. Each character has two special moves including one that depletes a character's health upon contact with an enemy and When two or more players play together, they can trigger a team-attack. Players can also find and use firearms, throwing weapons such as rocks and explosives, as well melee weapons such as clubs.

Note: Free Antivirus Software (like AVG/McAfee) might detect the (WinKawaks.exe) file as trojan but It is not a virus or trojan, just allow or add it to exception list. The is fully virus free and testified by many users.

To download this Game, just click any of the below mentioned links:
File Size: 6.22 MB
Password: "ja-techs.blogspot.com"

Rapidshare Link:

Hotfile Link:

Fileswap Link:

FileFactory Link:

Adrive Link:

GamePlay Video of 'Cadillacs and Dinosaurs' Game


Screenshot of 'Cadillacs and Dinosaurs' Game

Cadillacs and Dinosaurs Game Screenshot #1

Cadillacs and Dinosaurs Game Screenshot #2

Cadillacs and Dinosaurs Game Screenshot #3

Cadillacs and Dinosaurs Game Screenshot #4

Cadillacs and Dinosaurs Game Screenshot #5

Cadillacs and Dinosaurs Game Screenshot #6

Cadillacs and Dinosaurs Game Screenshot #7

Cadillacs and Dinosaurs Game Screenshot #8

Cadillacs and Dinosaurs Game Screenshot #9

Enjoy Playing the Game free.
For any assistance, leave your query or comment under this post.

Tuesday, 26 March 2013

WinKawaks Joypad/Joysticks Setting for All Games

Many of the people around the world has facing problem with WinKawaks Joypad or Joysticks setting because every time they are required to Redefine their Joypad/Stick setting in every game they wants to Play.

WinKawaks is an Emulator which will let you to play NeoGeo and Capcom Classic Games and WinKawaks supported approximately 600+ games, so it's quite boring for the Game Lovers to set their Joypad/Stick setting for all 600+ games manually and it will take huge time to complete this process. Most of the users are searching internet that how can they set their Joypad/Sticks settings for all games with automatically but many of them can't find the way. So my visitors are here to know this secret, which is really easy to set. You don't need any Tool or Software for doing it. This tutorial will teach you to set your WinKawaks Emulator Joypad/Sticks setting for all games. It doesn't matter that you have more than one Joypad you can set upto 4 Joypads. People are here very curious to know the trick.
It's requested to all who are using this Tutorial that follow the below steps respectively to avail this advantage. Neglecting any Step will not fix the issue.

Step #1
Connect your Joypads/Joysticks with your Computer.

Step #2
Go to the Root Directory of WinKawaks Emulator and Double Click
on "WinKawaks.exe" to start Emulator.

Step #3
Click on "File" then Click on "Load game" or Use "Alt+L" as
Shortcut key.

Step #4
Select any available game then click on "OK" button.

Step #5
After few seconds when game will be loaded then just use "Enter"
button from Keyboard to Pause the game.
Goto "Game>>Redefine keys...>>>Redefine keys Player 1...

Step #6
Set your Joypad setting once according to your choice. As mentioned
in the pic. If you have another Joypad the revise Step5 and go to
"Redefine keys Player2..." and again do Step6 for second Joypad.

Step #7
After setting your Joypad or Joypads just go to "Game" and click on
"Save settings to .ini now". As shown in pic.

Step #8
Now just go to "WinKawaks\ini". You will find "ini" folder inside
WinKawaks root directory. As I set up my Joypad setting with
"2020 Base Ball" due to which an file namely "2020bb.ini" placed.
(Your might be different than this one). Just Double Click on it.

Step #9
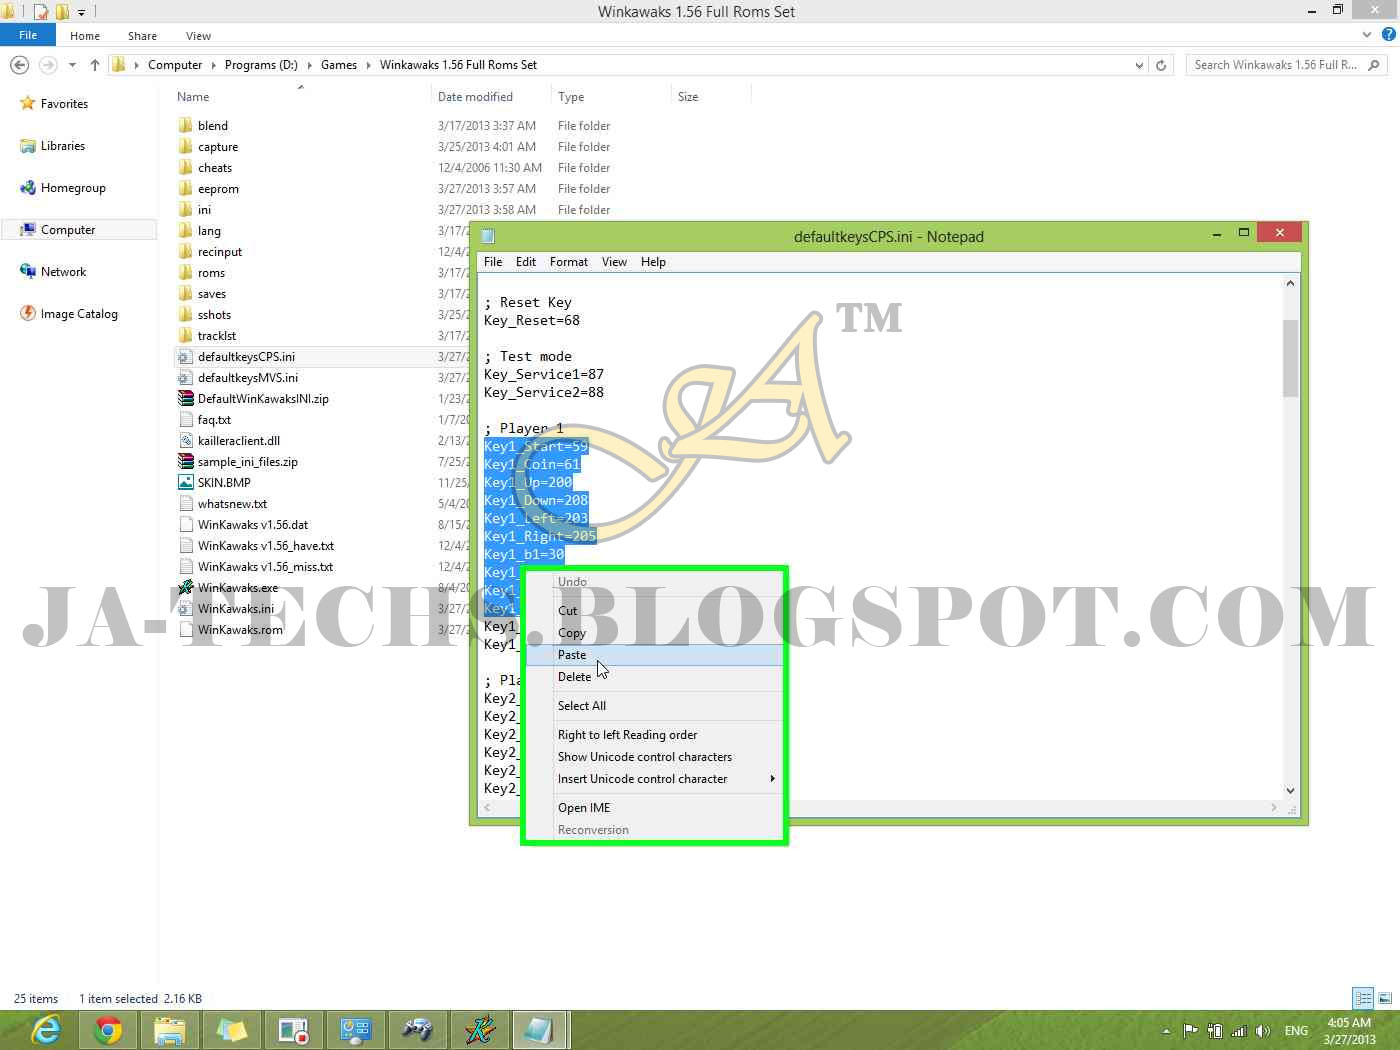
Select all Keys which were placed under "Player 1" text as
mentioned in above pic and "Copy" them.

Step #10
Now back to "WinKawaks" root directory. You will find 2 files,
which are "defaultkeysCPS.ini" and "defaultkeysMVS.ini".
Open "
defaultkeysCPS.ini" and replace all the keys under
Player 1 text using "Paste".

Step #11
Now hit Save button or "Ctrl+S" to save it.
(If using 2 or more Joypad then go to Step 9 and select & copy
all keys under Player 2 text and paste them as shown in Step 10)
Same Procedure for 3rd/4th JoyPads.

Step #12
Open "defaultkeysMVS.ini" and replace all the keys under
Player 1 text using "Paste" as shown above pic as well as Step 9.

Step #13
Finally hit Save button or "Ctrl+S" to save it. 
(If using 2 or more Joypad then go to Step 9 and select/copy 
all keys under Player 2 text and paste them as shown in Step 10)
Same Procedure for 3rd/4th JoyPads.

Now Open or Load any game and Play it using your Joypad/Joysticks with any further trouble and enjoy this trick.

"The ini file entitled "defaultkeysMVS.ini" is for NeoGeo/SNK games, which will allow you to use default setting for Joypad to all available NeoGeo Games, while "defaultkeysCPS.ini" is for Capcom games and it'll allow you to set your Joypad setting for all available Capcom Games."

So that's it the fixing for this Troubleshoot.
For assistance regarding the issue, please feel free to leave your query or comment under this post for quick response.

Wednesday, 13 March 2013

Metal Slug 2 Game PC Version

Download Metal Slug 2 - Super Vehicle-001/II Game for PC Free.

Metal Slug 2 Game for Windows/PC
This is second part of Metal Slug Series Game. Metal Slug 2 added new weapons to the player's arsenal. A single shot from the Laser is capable of killing a column of infantry, and sustained fire quickly destroys vehicles. Fire Bombs found in the second level help to clear away mummies. Armor Piercing Shells give the Metal Slug cannon shells that only fire straight when engaging enemy vehicles. The game was released in year 1999. It is the mutiplayer game to enjoy.

As the levels unfold, it turns out that Morden has allied with Martians to help facilitate his plans. In the final level of the game, the tables are turned when Morden comes under attack and is betrayed by his Martian allies and taken prisoner by them. An ad-hoc alliance is formed between the Peregrine Falcon squad and General Morden's army to combat the greater alien threat. 

Note: Free Antivirus Software (like AVG/McAfee) might detect the (WinKawaks.exe) file as trojan but It is not a virus or trojan, just allow or add it to exception list. The is fully virus free and testified by many users.

To download this game, just click any of the below provided links:
File Size: 17.96 MB
Password: "ja-techs.blogspot.com"

Rapidshare Link:

Hotfile Link:

Fileswap Link:

FileFactory Link:

Adrive Link:

GamePlay Video of Metal Slug 2 Game


Below pictures are screenshots of this Game:

Metal Slug 2 Game Screenshot - 1

Metal Slug 2 Game Screenshot - 2

Metal Slug 2 Game Screenshot - 3

Metal Slug 2 Game Screenshot - 4

Metal Slug 2 Game Screenshot - 5

Metal Slug 2 Game Screenshot - 6

Metal Slug 2 Game Screenshot - 7

Metal Slug 2 Game Screenshot - 8


Enjoy Playing Classic Game Free.
For any assistance, leave your query or comment under this post.