A few months ago Microsoft has announced the latest MS Office which is entitled as "Microsoft Office 2013". There are many facilities and improvement in MS Office 2013. So basically we are here to teach you regarding the setup of MS Outlook 2013 with your any Gmail Account.

Usually people wants and like the desktop mail setting because they will be notify when a new mail will arrive. And it very easy to build up. It is good thing that still Google is allowing their Pop and Smtp servers to enable this feature with MS Outlook. Although Yahoo Mail has stopped this service for free users since years ago. MS Outlook will provide you to received your mails quickly in your PC and sent mails simultaneously and you can also check your inbox anytime to find any older mail even without having internet connection because all of inbox/Outbox and saved mails will be backed up to your PC automatically. I personally use Gmail for Email Service and using MS Outlook since 4 or 5 years and It is working fantastically without having any trouble. So basically you are here to connect your Gmail account with MS Outlook 2013.
Even using MS Outlook 2013, you're still able to receives your mails in "Gmail Website" because there is an option to leave a copy of all receive mails to your "Gmail Inbox or Archived Folder".
So the step-wise tutorial with screenshots is given below, just read and follow the instructions carefully to avail this feature free.
Step No. 1
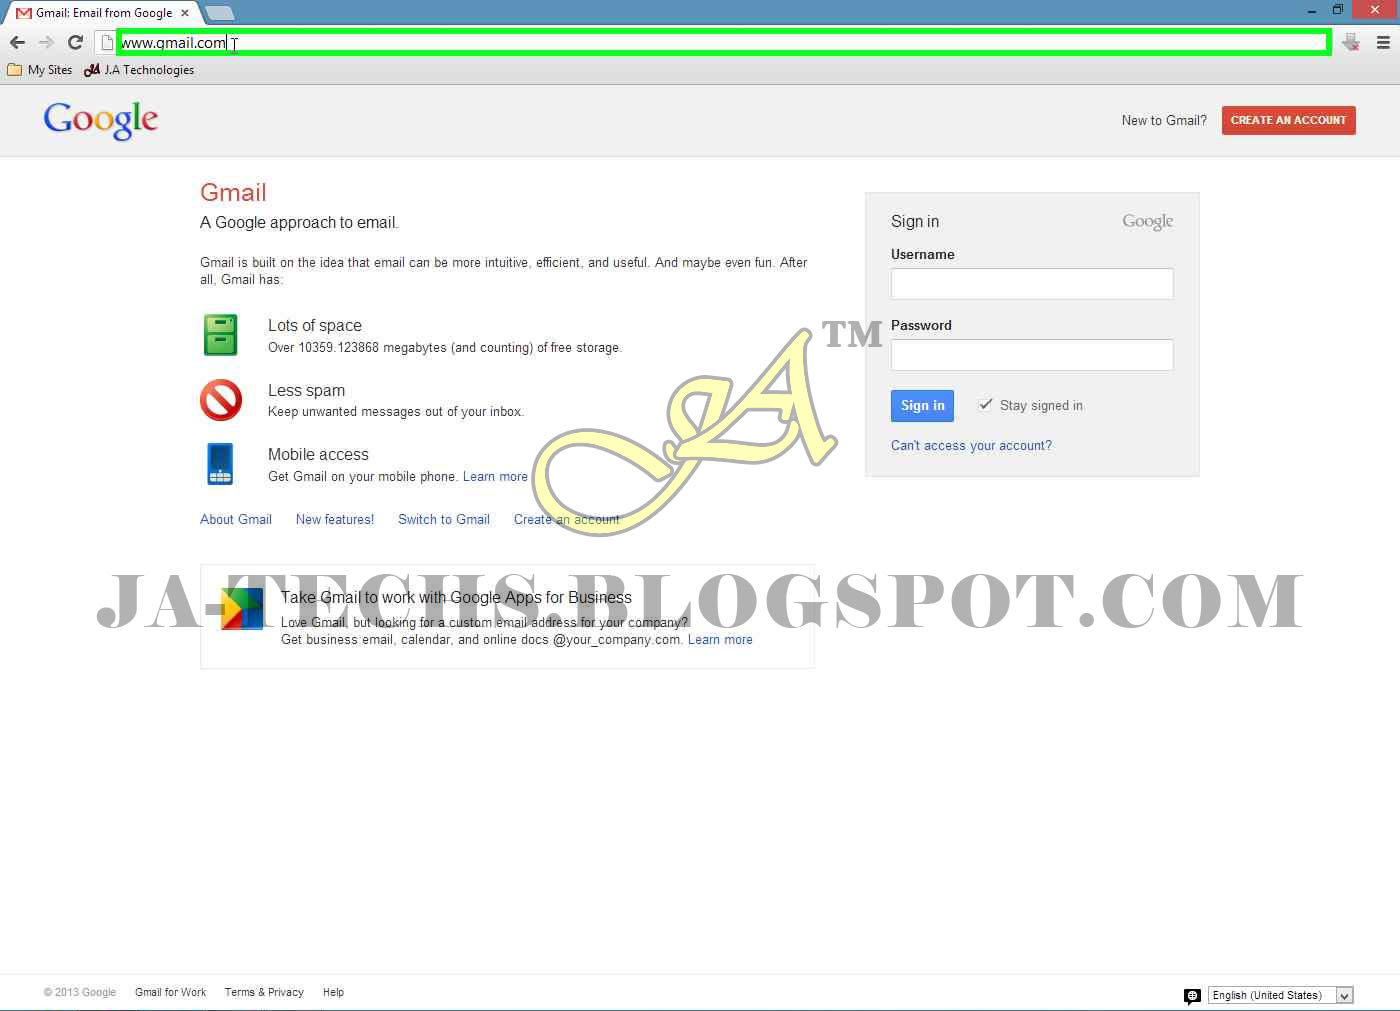 |
| Go to Gmail.com and login to your Gmail Account. |
Step No. 2
 |
| Just enter your correct "Username" and "Password" to login. |
Step No. 3
 |
| When you will be login successfully just go to "Settings" as shown in above picture. |
Step No. 4
 |
| On the Setting Screen just go to "Forwarding and POP/IMAP" Tab from where just Enable POP by selecting "Enable POP for all mail (even mail that's already been downloaded)" or select "Enable POP for mail that arrives from now on" (It depends upon you to choose whatever you wants but remember that by selecting first option and in case you have hundreds of mails in your inbox then it'll require enough time to download them first.) |
Step No. 5
 |
| After selecting "Enable POP" just click on "Save Changes" button. As mouse cursor is over it in above Image. |
Step No. 6
 |
| Now just open "MS Outlook 2013" by selecting the application. |
Step No. 7
 |
| If you are opening MS Outlook first time then It'll show in this way as shown in the above picture. Just click on "Next" button to proceed. |
Step No. 8
 |
| It will ask to setup Outlook. Choose "Yes" and click on "Next" button. |
Step No. 9
 |
| Now select "Manual setup or additional server types" and click on "Next" button to continue. |
Step No. 10
 |
| Choose "POP or IMAP" service and proceed with "Next" button. |
Step No. 11
 |
| Now Type your Name, full email address (with @gmail.com) and type incoming mail server as "pop.gmail.com" and outgoing mail server as "smtp.gmail.com". Now type User Name and Password. Remember that your User Name is your Gmail address so type full gmail address with (@gmail.com). "Check" on Remeber Password. and Click on "More Settings" button. |
Step No. 12
 |
| After clicking on More Settings, just Tab to Outgoing Server and "Check" on "My outgoing server(SMTP) requires authentication". |
Step No. 13
 |
| It's time to Tab "Advanced" check on "This server requires an encrypted connection (SSL). Then incoming Server (POP3) will be "995". |
Step No. 14
 |
| Just type "465" in "Outgoing server (SMTP) and select "SSL" encrypted connection as shown in the Picture and click "OK" |
Step No. 15
 |
| After clicking OK button, now just click on "Next" button to complete the final process. |
Step No. 16
 |
| Now Outlook will Test the connection and will send a Testing mail. When it'll show "All Tests completed successfully" just click on "Close". |
Step No. 17
 |
| So Click on "Finish" button to initialize your MS Outlook 2013. |
Step No. 18
 |
| Wait until it completes sending/receiving process and you'll see your Inbox mails after it'll download them to MS Outlook. So Now you can able to send and receive Emails through Outlook. |
Step No. 1-A
 |
| If you're opening "MS Outlook 2013" second or above time then just click on Blue "FILE" button as shown in image. |
Step No. 2-A
 |
| So here click on "Add Account" button as shown in Picture. And follow the Tutorial from Step No.8 to Step No.18. |
Finally that's the Tutorial for the people who wants to connect and use MS Outlook 2013 with their Gmail Accounts.
For assistance regarding the issue, please feel free to leave your query or comment under this post for quick response.
For assistance regarding the issue, please feel free to leave your query or comment under this post for quick response.
No comments:
Post a Comment